Friday, 30 December 2011

Timeless


Hi everyone. This will be my last post for the year. I've been very busy today. I found a new blog that I love and it is from this blog that my inspiration for the layout emerged. This sketch is taken from Lets Capture These Sketches sketch 108.

My layout:


I used lots of the gorgeous Prima and manor House Creations flowers as embellishments.


Paper : Webster’s Pages  Shady Lane, Natural Springs, Autumn Leaves
Ink: Distress Ink Antique linen, Tattered Angels Glimmer Mist Crème de Chocolate and Iridescent Gold, Ranger Crackle accents
Embellishments :
Prima Vines Summer Carnation Lemon, Prima flowers Angeelous, Ameruse Duchess Mix, Love Letters Roses Peridot, Prima Pearls Siip Swirls, Mini Rose
Manor House Creations roses leaves, cottage garden picket fence
Other: Kaisercraft Elegant Pearl, Wow Words or Whatever chipboard, Fiskars circle border punch Antique Elegance

Thanks for stopping by!


post signature

A Christmas Quilt


Hi everyone. I am going back in time to share a quilt I made. I used to watch Simply Quilts on Foxtel (so sad that it is no longer aired). This show inspired me to take up quilting. The quilt I am sharing was from two quilt designers who call their needle turn applique technique the 'piece o' cake way.'


In this book, there are a number a Christmas scenes. I selected two to create my quilt.


Here is one scene........


and another.....

I learnt a lot about applique. Needle turn applique is time consuming and looks easier than it seems (I need to practise more!)  I also applied machine applique in this quilt. I also attempted stippling to finish the quilt.

I certainly hope to complete another quilt in 2012. I have a umber of kits waiting to go! I may even have another go at completing another needle turn Christmas quilt.

Thanks for stopping by!
post signature

Thursday, 29 December 2011

Digital Layout


                                                  “If you don’t use it, you lose it!”  

This refers to my digital scrapbooking skills. Just to brush up on my photoshop abilities I decided to complete a layout.

Layout completed using Adobe Photoshop Elements 8
Elements : Kaisercraft  Armour Megakit, Brandy Murray Backporch embellishments, Jean Daugherty Designs At Last, Kim Hill Wishing Star Glittery Chipboard alpha, Shabby Princess Shabby Mommy kit alpha and numbers.

Please note: Kaisercraft digital store is not available at the moment. I read somewhere that it will return??

Thanks for stopping by. Feel free to leave a comment.

post signature

Wednesday, 28 December 2011

Kaisercraft #4 December Saturday Sketch


I’ve been scrapbooking for a little while now and in that time I didn’t follow sketches. I’m a convert, I love them! I have decided that I need to start using up my supplies and sketches are a fabulous way to achieve this.

The layout that I’ve completed is the Kaisercraft #4 Saturday sketch. 

My interpretation of the sketch:


To create the circular frame, cut a 7 ½” inch circle from the chipboard using the curvy cutter. Cut a 7” circle to create a circular frame. Using the chipboard select the Spellbinders Shapeabilities dies to cut 4 fleur de lis motifs and four fancy tags. Ink the die cut shapes as well as the frame using antique linen, then apply the creme de chocolate followed by iridescent gold glimmer mists.

Once dry glue the fleur de lis die cuts in the NESW positions on the frame. Cut the end of each of the die cut tags. The lace work is glued underneath the circular frame, evenly spaced between the fleur de lis motifs.


These flowers were created using the Spellbinders Shapeabilities spiral blossom one die using Devonshire - Clarabelle paper.


Supplies I used:
Paper: Kaisercraft Devonshire Collection - Clarabelle, Victorian Rose, Aurora, Devonshire Collection 6” paper pad
Ink: Tim Holtz Distress Ink antique linen, Tattered Angels Glimmer Mist Crème de Chocolate, iridescent gold
Embellishments: Kaisercraft Paper blooms sea breeze, mini paper blooms olive, Kaiserscrapbook wood flourishes, Spellbinders Shapeabilities Fleur de Lis motifs, Spellbinders Shapeabilities Fancy Tags, Spellbinders Shapeabilities spiral blossom one, Sizzix Sizzlits little leaves, Kaisercraft alpha chipboard, chipboard, olive green cardstock, EK Success Curvy Cutter Circle template set.

Thanks for looking!

post signature

Saturday, 24 December 2011

Gift Card Holder


Gift Card Tutorial

I wanted to make a gift card holder for some iTunes gift cards that I had purchased. After looking on the internet for some ideas or templates to use this is what I came up with.
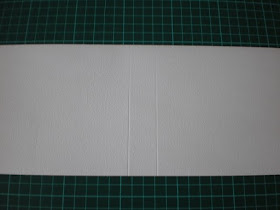
Cut a 5” x 12” piece of cardstock. Score it at 5  1/2” and 6  1/2”.

Using a punch, round the corners.
Select a piece of patterned paper/cardstock. Cut a 4 ½” square. Select a coordinating piece of cardstock and use a decorative punch to create a border.

Attach both to the front of the gift card holder. 

To create the insert for the gift card, cut a 2 ¾” x 5 ¾” piece of cardstock. Score the two short sides and one of the long sides at ½” and at 1/4”.

Cut the two squares created from the score lines. 

Apply a strong adhesive/double sided tape to the outer edge of the scored sides.

Fold over the scored sides and then attach to the inside of the gift card holder.

Place purchased gift card into the holder.  Using a circular hole punch, align the punch so that the punch goes through both layers of the holder and the top tab section of the gift card.

Add embellishments to the front of the gift card holder. Thread ribbon or as I did use curling ribbon to secure the holder.


This project can be personalised for any occasion and type of gift card. Looks much better than placing it inside an envelope!

Supplies I used:
Stamps: JustRite A Merry Little Christmas Set, Stampin’ Up To & From Tag
Ink: Stampin’ Up Read Red
Paper: Kaisercraft Silly season 6 ½” paper pad
Other: Red and white cardstock, foam tape, Spellbinders Nestabilities Petite Scalloped Circles large, Spellbinders Nestabilities Standard Circles large, Fiskars corner rounder punch, Martha Stewart Arch Lattice border punch, Stampin” Up tag punches.
Have a Merry Christmas and compliments of the season to you all!


post signature

Thursday, 22 December 2011

Adding a Signature

Hi everyone! I am still learning so much about blogging and in particular, how to personalise the appearance of my blog page. After many hours of trying to set up a live signature using Google, I managed to come up with something.

I used Photoshop to create my signature image. I uploaded it to Photobucket as you need a URL label in order to use it in Blogger.

The tutorial which worked for me was from the blog where I located the background template for my blog. http://blo64rt.blogspot.com/search/label/How%20to%20add%20own%20signature.  Follow these steps and hey presto, you have a live personalised signature!

One thing that I did find was that in a test post, there was a white box surrounding the signature. I decided to edit my signature but no matter what I did, or how much surfing on the net I did I couldn't create a transparent background.

My solution:

I took a screen shot of one section of the blog background where the posts feature and saved it as a jpeg. I went back to my original Photoshop signature file, added a layer and used the paintbucket tool to select the colour from the screenshot jpeg. I filled the background with this and now have a signature background that blends in with the blog background template. I then repeated the steps to upload this file to Photobucket to get a URL and just replaced this in the settings.

I am no expert, but if I find something more effective and not complicated I'll share it!

Have a great day,


post signature

Wednesday, 21 December 2011

Kaisercraft #1 December Saturday Sketch


Kaisercraft #1 December  Saturday Sketch

I have just completed a layout using one of the Saturday sketches offered by Kaisercraft. I chose to complete the #1 sketch. 


I decided to rotate the sketch, so that the photo would be in a portrait position. 

Supplies used:
Paper: Kaisercraft Bonjour Collection
Ink: Versa colour umber
Embellishments: Kaisercraft paper blooms dusty pink and sea breeze, floral vine.

Thanks for looking!
Cathy