Showing posts with label Megs Garden. Show all posts

Tuesday, 26 March 2019

Happy Birthday

Hello everyone! I hope that you are well. Today I am sharing a shabby chic/vintage styled card which I created using the French Roses Collection from Meg's Garden. While planning my design for my card, I gave myself a challenge to use some products from my stash that I haven't used in a long while.  


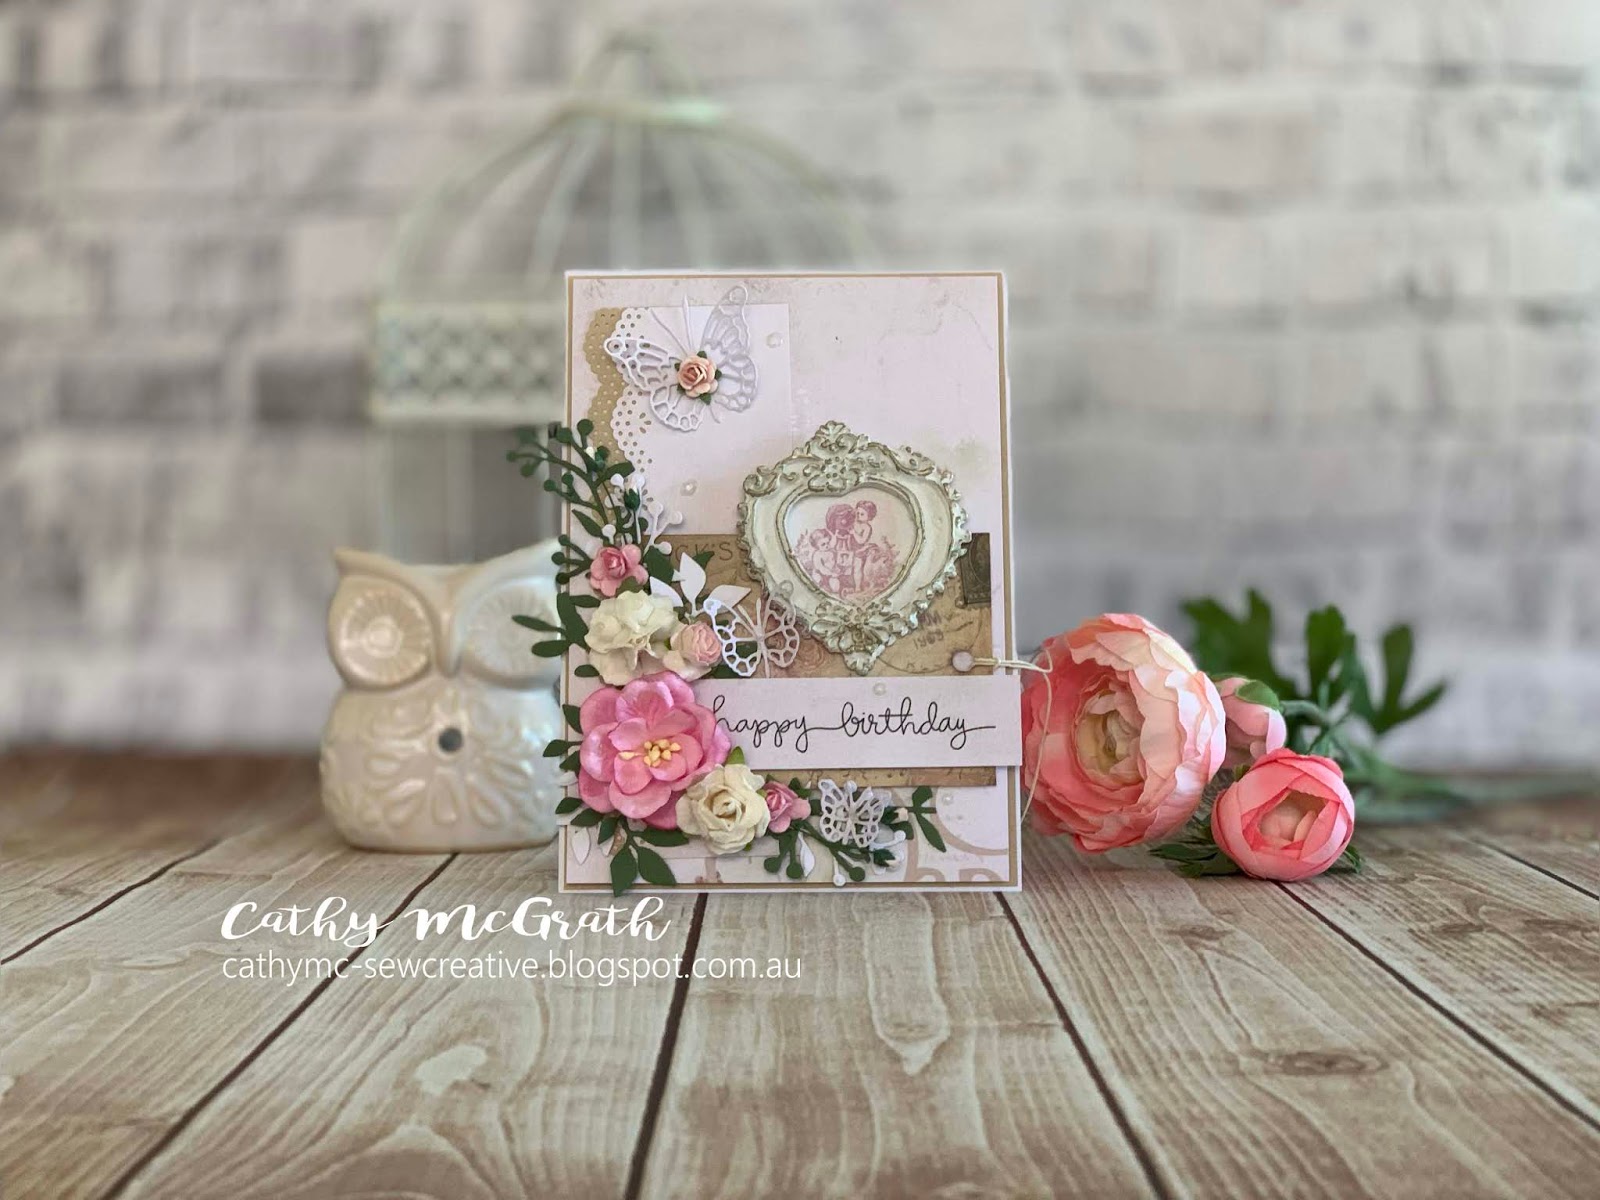
The results: border punches and paper clay frame (handmade). I went through a phase when I bought some moulds and made some frames. I haven't used any yet but I used one (yeah) on my card. I fussy cut an image from one of the cut and create papers from the collection and adhered it to the back of the frame. To age the frame, I dabbed my finger into some Prima white gold metallique wax and rubbed it over the edges of the frame.

 Lastly, I added lots of flowers and foliage to complete my card. I also added some drops of Nuvo crystal glaze on some of the petals of the flowers and in some random spots of the card to add some interest.


Supplies:

Papers: Meg's Garden French Roses 

Other: Versafine Onyx Black Ink, Memory Box Leavenworth Butterfly Trio, Tim Holtx Garden Greens, Martha Stewart Vintage Doily Punch, Prima Art Alchmeny White Gold Metallique Wax, Simon Says Stamp Handwritten Borders, Nuvo Crystal Glaze, Wild Orchid Crafts Flowers

Thanks so much for stopping by!


Wednesday, 27 February 2019

Shabby Chic Explosion Box


Hello everyone! I hope that yo are having a wonderful week. Today I am sharing a project that I have created using  the French Roses Collection from Megs Garden.


 I decided to create an explosion box, as I wanted to feature the ephemera (cut and create elements of the collection), lace and also beautiful flowers that coordinate so beautifully with this collection.

The centrepiece of my project is the cake. It features lace, pearls and flowers from Megs Garden.
On all of my panels, I used a circular Marianne Design die as my base and built up from it. Here I added a clock ephemera element as my focal image and added some flowers and a butterfly.


 Adding a flourish and flowers adds a a softness to each page and an overall cohesion to the panels.

When selecting my images, I selected pairs...two florals and two non florals...for balance.

Supplies:

Megs Garden French Roses
Flowers
Lace
Bundle Pinks Shabby Chic

Other: Hero Arts Infinity Circle dies, Memory Box Amira Flourish, Botannical Stem and Whimsical Flourish, Marianne Design CR1201.


Thanks so much for stopping by!


Tuesday, 29 January 2019

Heartfelt Wishes

Hello everyone! I hope that you are well. Today I am sharing a card which features dies and stamps. I love the detail in the Altenew stamps and in particular one of my favourites is the Vintage Roses set. I have made a few cards in the past using this set and I manage to find new ways to showcase the stamped flowers in a configuration that I am pleased with.

My first layer is a complimentary pink cardstock followed by Spellbinders die cut which is adhered with foam tape. A pink oval followed by a white oval and then the two fishtail flags are layered on top. I adhered the ovals with foam tape, as well as the leaves to add dimension and depth to my card. Finally I added the flowers and some sequins to complete.

Supplies

Stamp: Altenew Vintage Roses, Hero Arts Everyday Messages

Paper: Kaisercraft Coconut and Musk Cardstock

Ink: Altenew Frosty Pink, Cotton Candy, Coral Berry, Frayed Leaf, Forest Glades, Evergreen, Versafine Onxy Black Ink

Dies: Altenew Vintage Roses, Die0namics Fishtail Flags, Cheery-Lynn Horizon Fishtail Banners,  

Other: Darice Crystal Cup Sequins

Thanks so much for stopping by!


Thursday, 3 January 2019

Hello ~ Meg's Garden

Hello everyone! Best wishes to you and yours for the holiday season. It has been a while since I have created a project for Meg's Garden and I felt my sentiment of 'hello' was fitting. Today I am using papers from the Spring Flowers Collection. There are soft pastel tones, vintage ephemera and lovely delicate images to create shabby chic projects.

To add dimension to my layers, I have used lots of foam tape! I used a large die from Poppy Stamps called Big Hello. I liked the thin script so you can see the beautiful papers beneath.
I  added some Nuvo Glitter Accents to add a bit of sparkle in random places including on the flowers.
I layered an older border Spellbinders Parisian accents die from my stash to compliment the lace. I also cut down a doily to frame one of the ephemera cards. These all add to the shabby chic feel of the card.

Supplies:


Thanks so much for stopping!


Sunday, 29 April 2018

Do What You Love

Hello everyone! I hope that you are well. Today's post is a little bit different. These projects were completed toward the end of my school term. I was feeling stressed and needed to relax so I was colouring a little bit each night for some relaxation. I was also using this as an opportunity to practise my copic colouring as I haven't done any for ages. I had some practice images and I decided that one was good enough to use on a project. I played around with my distress oxides and before I knew it...a card had been created!


I used some of the Shabby Chic Background papers in my card and the sentiment of a Christmas stamp!

My second card is an elegant card which again uses the Shabby Chic papers. I have wanted to make one these card wrap cards for a while and decided that I would see if I had a suitable die in my stash and have a go and make one.

I had a Heartfelt Creations layered posy die which was originally designed to create a gatefold styled card and it was perfect for this card. I then die cut Memory Box Kensington Branch die along with the sentiment which is part of set from Tim Holtz Celebrate die collection. I needed to have elements that complimented the elegant swirls from the wrap portion of the die.
This middle section of the card lifts up as a top folding card so that you can write your sentiments inside.

Two very different projects completed using the same paper collection but created just for the purpose of enjoyment!

Supplies:
Meg's Garden
Paper: Shabby Chic Backgrounds
Lace
White Paper Rose
Ribbon

Thanks so much for stooping by!


Tuesday, 6 March 2018

Love Always plus a tutorial


Hello everyone! This post has taken me a while as its been a very busy week! I was inspired to do do some stamping and created this card using Altenew's Vintage Roses Stamp set. I have a few of these layering stamp sets as I love the depth and the beautiful images you can create with them.

I decided to have a heart shaped wreath as the focal of my card and to stamp my flowers around this.
I selected the lace background paper from the Shabby Chic backgrounds as I thought that the stamps would compliment it the best. I fussy cut the butterfly from the ephemera to add another soft romantic touch to the card. I stamped my sentiment onto some vellum so that my stamping would still remain visible.

Below is a tutorial demonstrating how to create the stamped heart floral wreath.


Supplies:


Other
Altenew Inks Frosty Pink, Cotton Candy, Coral Berry, Frayed Leaf and Forest Glades
Hero Arts Black
Waltzingmouse Stamps Say It Loud
Spellbinders Classic Hearts
Simon Says Stamp Masking paper
Pretty Pink Posh Sparkling Confetti Clear Mix
Vellum

Thanks so much for stopping by!


Related Posts Plugin for WordPress, Blogger...