Showing posts with label Waltzingmouse stamps. Show all posts

Saturday, 8 September 2012

Let's Celebrate - Paper House Box


Hello everyone. I am sharing a project that I have completed for the Shabby Tea Room Labor of Love challenge. For this challenge you are asked to create a card or project inspired by the COLORS IN THE PHOTO and INCLUDE A BANNER!

Labor day is not celebrated in Australia, so I did a little bit of research. I read that there are lots of decorations and parades on this day. I felt that from the inspiration photo, I would decorate the front of a house and have a house card as my submission....well I got a little bit carried away and created a house instead! I stamped a sentiment and die cut a fancy tag and placed it above the door with some foam tape. The scroll adds a nice touch to the front of the house.

I have a range of digital papers that include a wood styled background paper, perfect for a paper house. I die cut some shapes to create the windows. I also printed a selection of  digital papers and cut our fishtail banners from these.

Supplies:

Paper House template: House of Cards

Paper: Brandy Murray Back Porch kit, DCWV neutral stack, 4th July freebie, Retro Zing red, white and blue papers

Stamps: Waltzingmouse Oval classic frames, JustRite Stampers Just Because set

Ink: Distress ink walnut stain and old paper

Other: Spellbiinders shapeabilities fancy tags, Spellbinders nestabilities classic squares small, circles small and rectangles small, Hooked on Craft flowers, Martha Stewart branch punch , My Minds Eye twine, Die-namics woodgrain fence, Stampin' Up punch.

Thanks for stopping by!


post signature

Saturday, 4 August 2012

Thanks


Hello! I am back with a card that I have been working on all week for the Shabby Tea Room Sweet Summertime challenge. For the challenge you are required to create a card or project inspired by the COLORS in the photo AND INCLUDE FLOWER(S) PLUS A STAMPED ELEMENT!


For my card I wanted to use a Heartfelt Creation die that I had recently purchased. I had found a tutorial on Kittie Caracciolo's blog. She has some wonderful cards and kindly has tutorials on how to create dimensional elements including flowers. I followed her hydrangea tutorial to create a dimensional hydrangea on my card.

I don't own the Martha Stewart punch she used in her tutorial. I used a small daisy punch to create the individual flowers in the hydrangea. Very time intensive but worth it!

I used a flourish stamp on the outside of my card. I repeated the stamp on the inside as well.

After reading some blog sites regarding intricate dies, the recommendation is to use wax paper to assist in removing the die from the cardstock. I thought I owned some and in fact it wasn't the right kind of paper. For any Australian readers, greaseproof paper is not the same. I had such difficulty in releasing the die from the cardstock as it would really become stuck and I did have some tears. As things would happen, I did find some wax paper today when I did my groceries AFTER I had finished the card and yes it really does work! (Again for any Australian readers Coles sells it in the freezer bag section).


Now that I have the tools (wax paper), I am willing to give intricate dies another go!

Supplies:

Stamps: Waltzingmouse Stamps Large Doily, Autumn Leaves flourishes

Ink: Stampin' Up! Old Olive and Bashful Blue

Other: Heartfelt Creations Layered Elelgant Swirl, Spellbinders nestabilities circles small, Hooked on Craft flowers, EK Success small daisy punch, Kaisercraft paper bloom, Fiskars Tag punch, seam binding, foam tape.

Thanks for stopping by!


post signature

Thursday, 19 July 2012

My Dear

Hello everyone. What a busy week one has been. It is amazing how quickly the holidays pass and how the work load grows at an astronomical rate! I have been hesitant to use my Pion papers, as I love them so much and feel apprehensive that I may do more harm than good with my creations. But I took the plunge and used them to create my card.

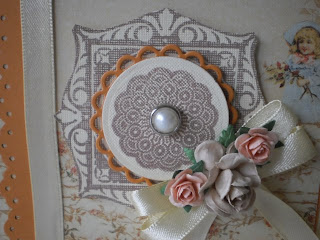
My card follows this weeks sketch from Waltzingmouse Stamps. I used papers from Pion Designs, which coordinate beautifully together. I distressed and inked the edges of most of my layers. Here are some close ups...


Supplies:

Stamps: Waltzingmouse Stamps Vintage Lables 18 and Cameo To Go

Ink: Distress Ink Old Paper and Stampin' Up! Soft Suede

Paper: Pion Designs Studio of Memories and Stampin' Up! Very Vanilla cardstock

Other: Spellbinders Nestabilities labels 18, Martha Stewart doily lace punch, Nostalgia florals, Hooked on Craft flowers, seam binding. Bow Easy and lace.

Have a great day and thanks for stopping by!


post signature

Friday, 29 June 2012

A Vintage Birthday

Hi everyone. The sun is out and it looks like it will be a great day today. The card I am sharing with you follows the sketch from Waltzingmouse Stamps.


I wanted to have a change again from my typical card designs and go for a more vintage feel. I also wanted it be masculine in appearance, a potential card for any male.

The bottom section of the card I really struggled with. I decided to use fish tail type banners to achieve this portion of the sketch.
I used a die cut from my paper pad to stamp a background. then distressed and inked some complimentary paper, also from the paper pad.

Supplies:

Stamps: Waltzingmouse Stamps Fancy Phrases and Vintage Labels 18

Ink: Distress Ink Old Paper and Walnut Stain

Paper: Kaisercraft vanilla and Devonshire Collection 6" paper pad

Other: Spellbinders Nestabilities Romantic Rectangles, Spellbinders Shapeabilities Fancy Tags, Prima Flower, Kaisercraft mini paper bloom and pearls, string, Bow easy, Prima distressing tool.

Thanks for stopping by!

post signature

Thursday, 14 June 2012

Vintage Gem

Hi everyone. My latest card follows the latest Waltzingmouse sketch challenge.


I have been feeling that my mojo has gone lately....partly due to the fact I am exhausted and it is nearly the end of term.

My first card attempt felt good in theory, but ended up in the bin! My second attempt is the card that I am sharing with you. I really do like this colour combination and feel that this card is what I was aiming for. I wanted to depart from my usual pastel coloured creations and have a more vintage feel this time. Here is a close up...

It is nearly school holidays and hopefully my mojo will be back. Sleep, rest and time...can't wait!

Supplies:

Stamps: Waltzingmouse Stamps Vintage labels 10 and Fancy Phrases

Ink: Stampin' Up! Cherry Cobbler, Versafine onyx black

Paper: Kaisercraft December 25th Faith, DCWV brights, Stampin' Up Real Red

Other: Spellbinders Nestabilities labels ten, Stampin' Up! real red ribbon, Bow Easy, die cut butterfly, Rosie's diamonte brad, Francheville Passionate rhinestone stickers.

Thanks for stopping by! 


post signature

Tuesday, 22 May 2012

Silver Beauty


Hi fellow friends. I am sharing my take on the latest Waltzingmouse Sketch.
This week, I decided to tackle silver. After going through my stash, I pulled out some vellum papers and discovered things I had forgotten I had!!

My background paper is a vellum with a subtle silver design going through it (you can't really tell in my photos). I stamped the sentiment and focal images from the  Waltzingmouse Victorian Frippery stamp set with Versamark ink and then embossed with silver embossing powder.

I used some silver vellum to add borders to my images. I die cut a border strip with the silver and love how it looks in the centre of the card.


To complete the card, I added ribbon, lace and a trinket pin. I also used the silver filigree heart brad to add a final silver touch to the card.

Supplies:

Stamps: Waltzingmouse Stamps Victorian Frippery

Other: White card stock, Silver Vellum and patterned vellum, Spellbinders Nestabilities standard circles large, classic squares large and classic scalloped squares large, Spellbinders Shapeabilities Fleur De Lis Accents, Versamark, American Crafts Zing silver embossing powder, Hooked on Craft trinket pin, Autumn Leaves scrap metal, ribbon, lace, Bow Easy.

Thanks for stopping by!


post signature

Tuesday, 17 April 2012

Congratulations


Hi everyone. I’m back with a new card which is for the WMSC93 sketch.


I wanted to use my new stamps for this challenge. I used the Vintage Labels 18 stamp, but trimmed it down for the card. I also used Prima papers as a starting point. It came with a printed border, perfect for this sketch.


I layered it with some dies and also with one of the Doily stamps, finished with a pearl brad.

 
I trimmed one of my dies, to create the sentiment tag. I also used some punches and ribbon to create a border on the side of my card.


Supplies:

Paper: Prima Romantique, DCWV pastel

Stamps: Waltzingmouse Fancy Phrases, Large Doily and Vintage Labels 18.

Ink: Versafine Vintage Sepia

Other: Spellbinders Nestabilities standard circles small, lacey circles, Spellbinders Shapeabilities fancy tags 3, Hooked on Craft flowers, Fiskars scallop punch, Stampin’ Up punch, Bow easy, creme ribbon, pearl sticker.

Thanks for stopping by!


post signature

Tuesday, 10 April 2012

Birthday Wishes


Hi everyone. I am loving being on holidays! I have been able to accomplish so much. I managed to finish my quilt top yesterday and am considering machine quilting it myself. 
The card I am sharing with you today follows the WMSC92 and the colours follow palette #105 from the Color Room.


The papers actually are more blue than in the photos. This was an interesting colour palette to work with as I don't tend to use yellow in projects.
Supplies:
Paper: My Minds Eye Miss Caroline, DCWV pastels and neutrals
Ink: Distress ink Antique Linine, Versafine Vintage Sepia
Stamp: Waltzingmouse Fancy Phrases
Other: Spellbinders Nestabilities fleur de lis rectangles and classic rectangles large, Spellbinders Shapeabilities Fancy Tags 2, Want 2 Scrap nestabling fancy tags 2, Kaisercraft mini paper blooms buttercream and iceberg, Stampin” Up banner punch.
Thanks for stopping by!


post signature
Related Posts Plugin for WordPress, Blogger...